
Disclaimer : The information provided in this article is for educational and informational purposes only and is not intended as a substitute for professional medical advice, diagnosis, or treatment. This guide is not a substitute for a physical examination or a formal review of your MRI images by a licensed medical doctor. Never disregard professional medical advice or delay in seeking it because of something you have read here. If you think you may have a medical emergency, call your doctor or emergency services immediately.
Table of Contents
Persistent lower back pain, sharp shooting leg sensations, or unexplained numbness in the lower extremities can throw daily life into complete disarray. When conservative physical therapy or over-the-counter pain relievers fail to resolve these symptoms, doctors turn to magnetic resonance imaging to pinpoint the underlying structural breakdown. For many patients, holding up a bulging disc MRI image for the first time brings a mix of relief and confusion. Medical scans resemble dark, shadowy maps filled with subtle shades of gray, black, and white that require trained eyes to decipher.
Learning how radiologists interpret these scans transforms a confusing diagnostic film into a clear roadmap for recovery. By understanding how spinal discs behave, what structural shifts appear on a scan, and how medical teams differentiate between minor wear and active nerve impingement, patients can participate far more effectively in their own treatment decisions.
What Happens When You Look at a Bulging Disc MRI Image?
Magnetic Resonance Imaging uses strong magnetic fields alongside radio waves to generate cross-sectional slice views of soft tissue. Standard X-rays excel at showing broken bones, but they pass right through soft structures like cartilage, ligaments, and spinal discs. An MRI, on the other hand, captures these soft tissues in vivid detail.
When a radiologist evaluates a bulging disc MRI image, two main view sequences matter most: T1-weighted images and T2-weighted images. T1 sequences clearly delineate fat distributions and basic anatomical boundaries. T2 sequences light up water and fluid.
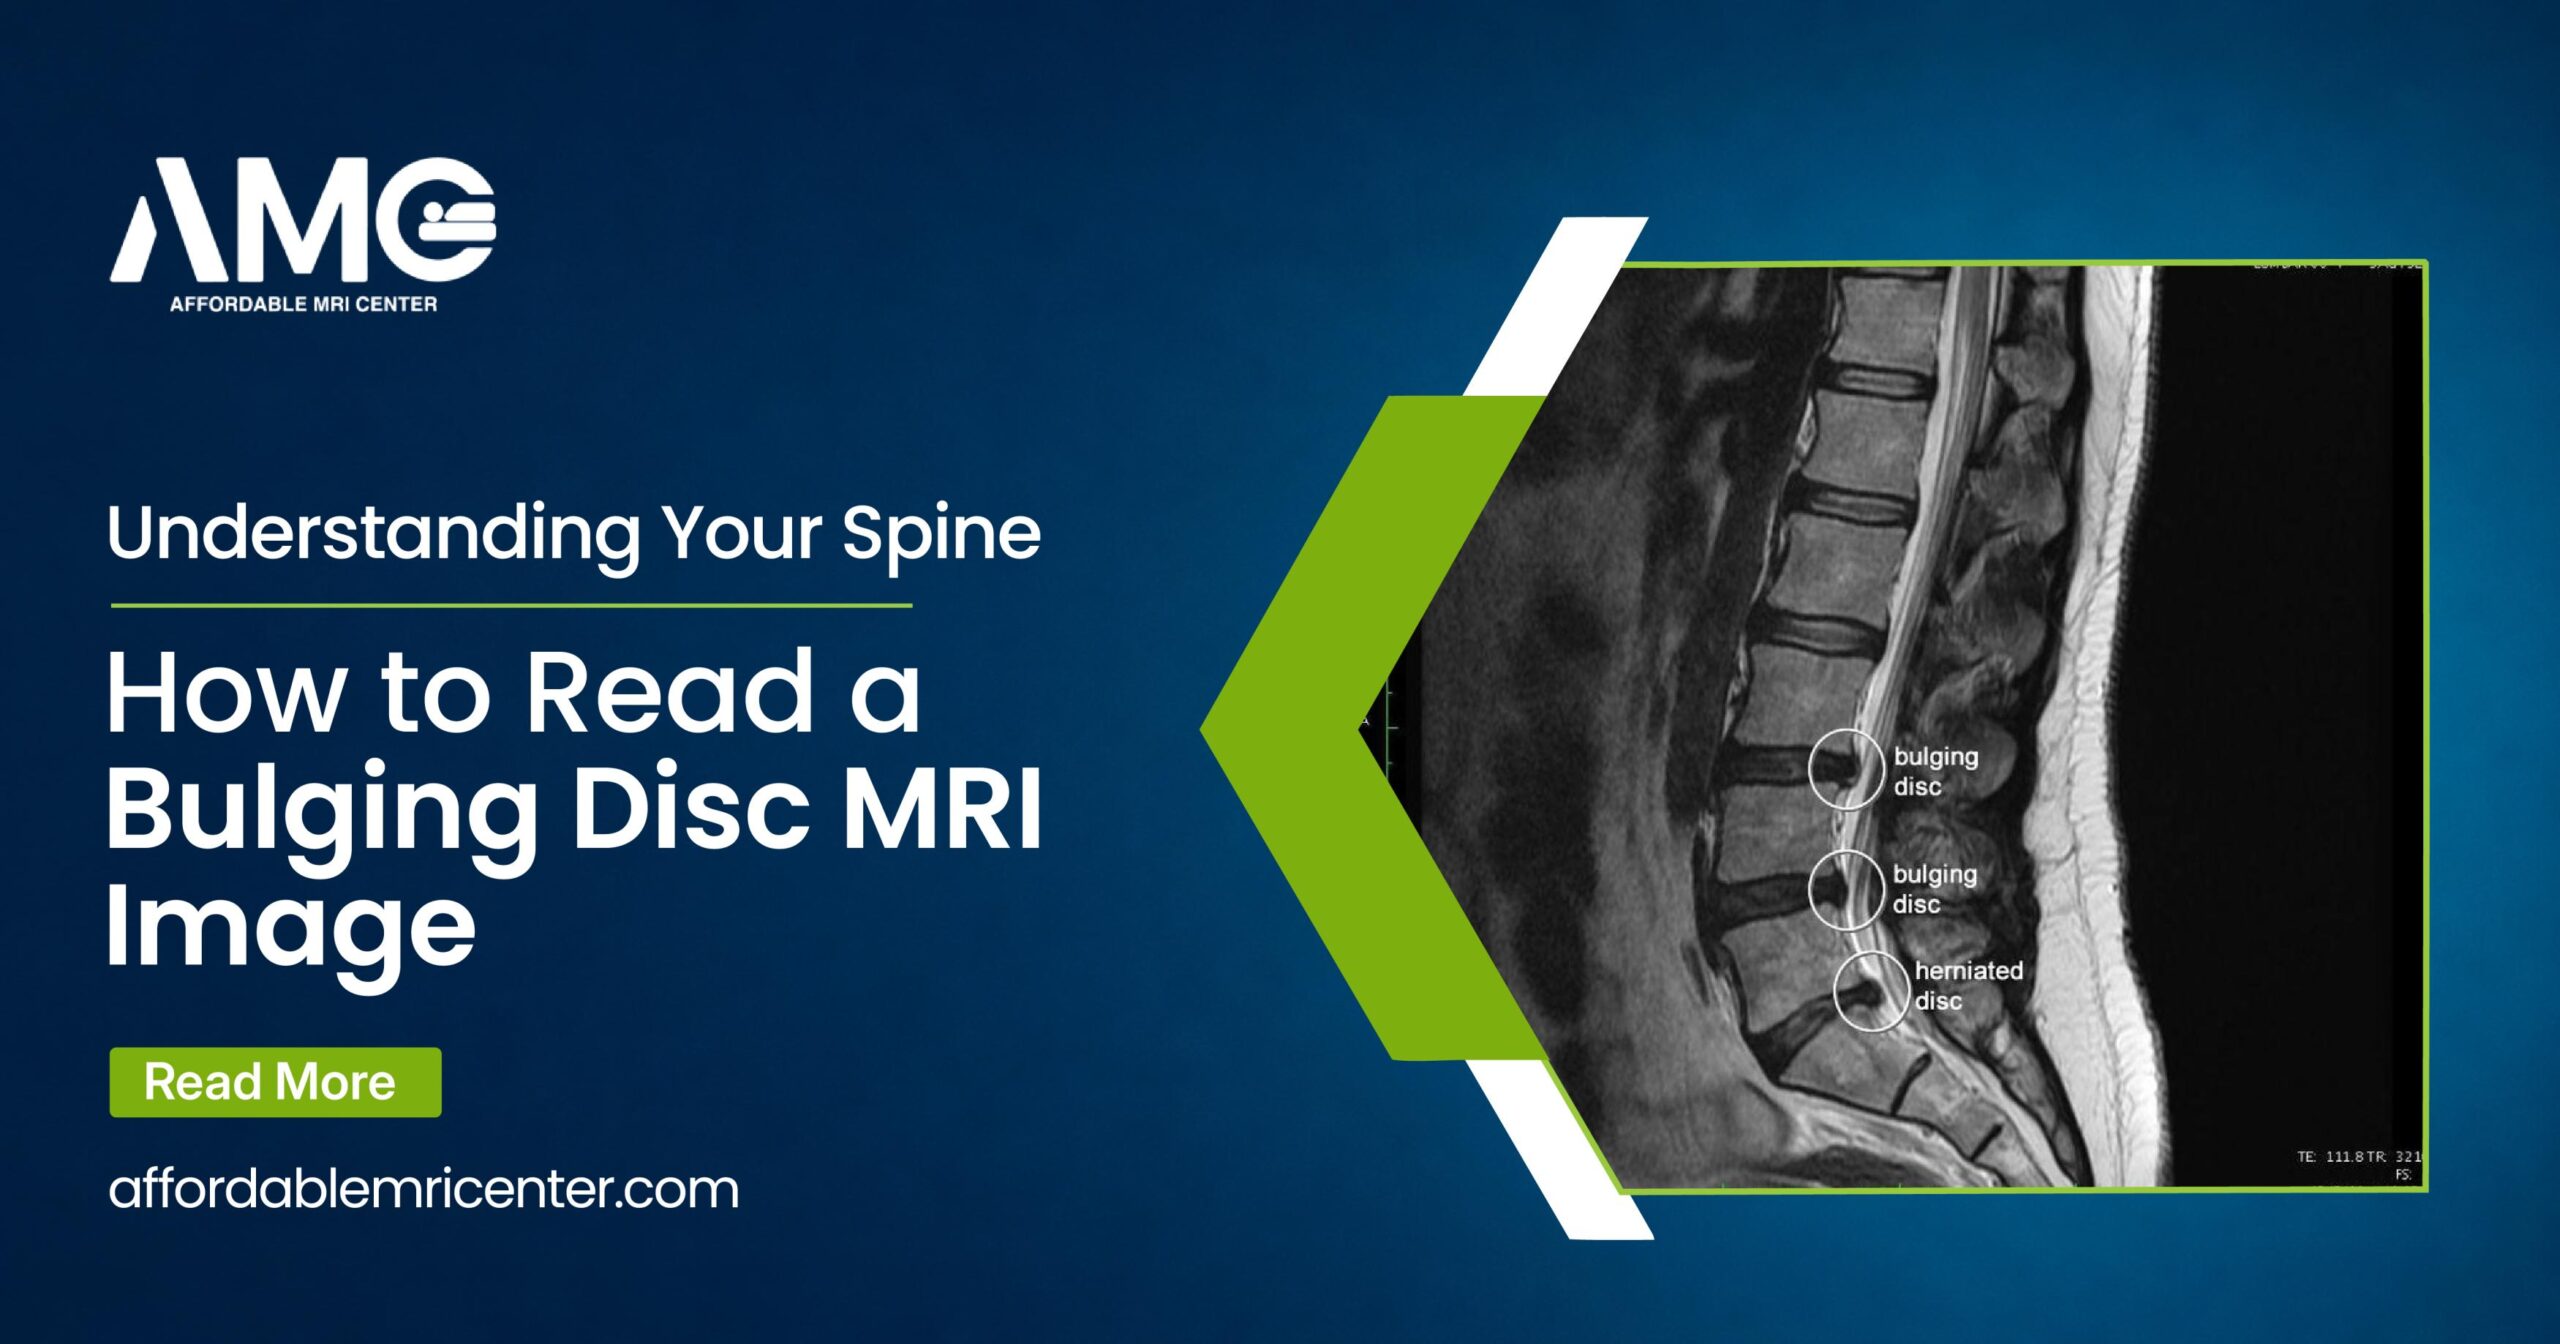
Healthy spinal discs consist of a firm outer ring surrounding a hydrated, jelly-like inner core. On a T2 sequence, a well-hydrated disc holds abundant water and shows up bright white. As discs age, lose water, or buckle under mechanical pressure, that bright white signal fades into dark gray or black. Radiologists refer to this drying-out process as disc desiccation. When examining bulging disc MRI pictures, medical specialists track this loss of hydration alongside any outward expansion of the disc boundary into the surrounding spinal space.
Anatomical Indicators on T2-Weighted Lumbar Scans
Comparing healthy spinal structures against degenerated or displaced tissue helps explain why certain physical symptoms occur.
| Spinal Component | Normal Visual Features (T2 Sequence) | Changes Observed with a Bulging or Degenerated Disc |
|---|---|---|
| Intervertebral Nucleus | Plump, bright white center indicating high fluid retention. | Flattened, dark gray or black appearance caused by water loss. |
| Annulus Fibrosus | Smooth, dark outer ring containing the inner gel intact. | Stretched, flattened, or protruding outward into neighboring channels. |
| Thecal Sac | Unobstructed white vertical column housing spinal nerves. | Showcases an indentation or flat spot where disc tissue pushes inward. |
| Neuroforaminal Space | Clear, open lateral passages surrounded by protective fat. | Narrowed channels (foraminal stenosis) where exiting nerves face potential pinch points. |
Bulging vs. Herniated Discs: Key Visual Differences
Patients often hear the terms “bulging disc” and “herniated disc” used as if they mean the exact same thing. In clinical practice, however, they represent distinct structural problems.
A bulging disc affects a broad section of the disc perimeter—often 50% or more of its circumference. Think of a tire under-inflated under a heavy load: the outer rubber wall bulges outward evenly, but the wall itself remains intact. Because a bulge is spread over a wide area, it may cause mild aching or even remain completely symptom-free if it does not press directly against a nerve. Looking at a bulging disc MRI image, clinicians see a wide, smooth extension of disc tissue extending past the edges of the adjacent vertebrae.
A herniated disc occurs when the tough outer wall suffers a focal tear or crack. The soft inner gel squirts out through that tear directly into the spinal canal or nerve exits. When reviewing pictures of a herniated disc from MRI, the image displays a localized, irregular protrusion rather than a broad, uniform curve.
Classifying Abnormalities on Herniated Disk MRI Pictures
Radiologists rely on precise categorization when reviewing images of herniated disk on MRI to help surgeons and pain management physicians choose the right intervention:
- Disc Protrusion: The base of the displaced disc material remains wider than the distance it extends into the canal. The outer wall is severely stretched but may still hold the core inside.
- Disc Extrusion: The inner gel forces its way through a complete tear in the outer wall, expanding into a bulbous or mushroom shape inside the canal space.
- Disc Sequestration: A portion of the extruded gel breaks completely free from the main disc body and floats independently within the spinal canal, triggering significant inflammatory responses.
Because a focal herniation concentrates pressure on a single nerve root, herniated disk MRI pictures frequently correlate with severe, acute symptoms like burning leg pain or sharp numbness down the back of the thigh.
The Lumbar Hotspot: Evaluating an L4 L5 Bulging Disc MRI Image
While disc problems can develop in the neck or upper back, the lower spine absorbs the highest degree of mechanical wear. The junction between the fourth and fifth lumbar vertebrae—known as the L4-L5 level—carries immense force during walking, lifting, bending, and sitting.
An l4 l5 bulging disc MRI is among the most frequently requested spinal scans in orthopedics. At this level, the L5 nerve root exits the spinal column on its way down through the buttocks and legs. If an MRI scan shows a broad disc bulge at L4-L5 pushing into the neural canal, it explains why an individual might experience stiffness in the lower back along with weakness when trying to lift their big toe or foot (a clinical sign known as foot drop).
Why Does a Bulging Disc MRI Image Show Darker Discs?
A common question patients ask when reviewing their scans is why specific discs look pitch black while others look healthy and bright. The dark tone indicates dehydration. As spinal discs age or suffer mechanical wear, their ability to hold onto water diminishes. On T2-weighted MRI sequences, water appears white, while dry, depleted tissue appears dark. A dark disc on an MRI confirms that the shock absorber has lost its springiness and fluid buffer, making it more prone to bulging outward under the body’s weight.
If an l4 l5 bulging disc MRI demonstrates a broad bulge without significant nerve root compression, conservative management serves as the first line of defense. Core stabilization exercises, targeted stretching, physical therapy, and anti-inflammatory strategies usually allow the tissue irritation to settle over several weeks.
If the scan reveals severe canal stenosis or direct nerve pinching alongside persistent leg weakness, doctors use those precise visual coordinates to guide targeted epidural injections or plan minimally invasive surgical decompression.
Decoding Your Radiology Report: Terms Demystified
Alongside the visual scan files, a radiologist issues a written evaluation filled with technical medical terminology. Translating these terms helps turn a daunting document into clear knowledge.
Common Diagnostic Language in Lumbar Spine Reports
| Term Found on MRI Report | Plain-Language Meaning | Clinical Significance |
|---|---|---|
| Disc Desiccation | Structural drying out of the intervertebral disc. | Early indicator of natural wear; reduces shock absorption. |
| Neural Foraminal Stenosis | Narrowing of the side openings where nerves leave the spine. | Can lead to localized or radiating nerve pain down the arm or leg. |
| Thecal Sac Effacement | Disc tissue flattening the outer protective lining of the spinal cord. | Indicates physical contact between disc material and central nerve pathways. |
| Broad-Based Bulge | Disc expansion covering more than 25% of the total disc margin. | Common structural change that may or may not cause active pain symptoms. |
| Modic Changes | Bone marrow reactions in the vertebrae directly adjacent to a bad disc. | Often associated with localized deep mechanical back pain and inflammation. |
Taking Control of Your Diagnostic Path
Frequently Asked Questions
On an MRI scan, a herniated disc appears as a prominent, localized projection of tissue breaking through the normal outer rim of the spinal disc. Unlike a symmetrical bulge, a herniation looks like a distinct bump or droplet extending directly into the light-colored, fluid-filled spinal canal, often pressing directly against dark, thread-like nerve roots.
No. An abnormal scan alone does not mean surgery is required. Many people walk around with broad disc bulges on their MRI images without experiencing any pain or mobility limitations whatsoever. Surgeons only consider operative options when physical symptoms—such as progressive muscle weakness or severe nerve pain—fail to improve with non-invasive therapies and match the specific physical block seen on the scan.
Yes. While the physical disc wall may not completely return to its teenage shape, surrounding tissue inflammation frequently decreases over time. The body’s immune system can also gradually break down small bits of protruding disc tissue, taking pressure off compressed nerves and allowing pain to resolve naturally through physical therapy and posture modifications.
A standard non-contrast lumbar spine MRI scan typically takes between 15 and 30 minutes. During the scan, the patient lies still inside a quiet, tube-like scanner while radio waves capture multiple detailed cross-sectional pictures of the lower back.